 Audio Flashcards
 Peter from Audio Flashcards · 18 October 2026

Audio flashcards are flashcards you listen to. Each card is a short stack of audio clips, usually a question and an answer. You hear the question, answer it in your head, then hear the answer and say how well you knew it. Nothing needs reading, so you can review on a walk, in the car or while you do the dishes.
This guide shows how to make them in Audio Flashcards, which is free on iPhone, iPad, Mac and Android. Your first card takes about a minute.
What you need
- Audio Flashcards from the App Store or Google Play. It is free with ads.
- Headphones if you can. A headset microphone helps when you record in a room that echoes.
You do not need an account. Your cards are ordinary files on your device or in iCloud Drive.
1. Choose a folder
Open the Library tab. Folders keep subjects apart, and you can review one folder on its own. Open the folder the card belongs in, or make one with + > New Folder.
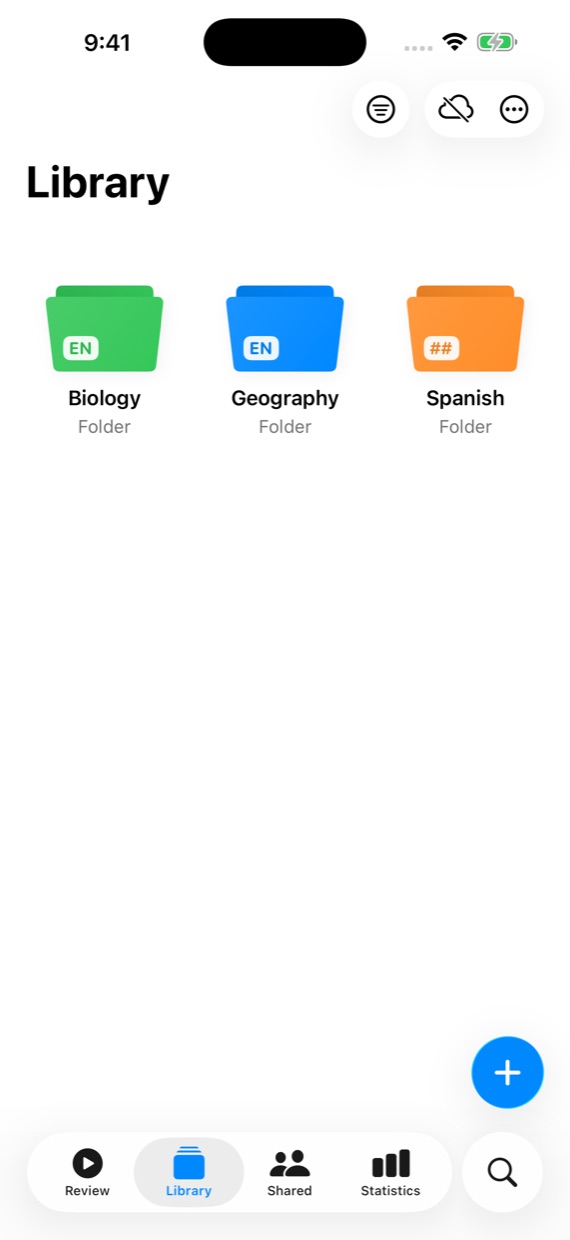
Folder Settings, in a folder's menu, sets which languages it expects to hear, one per side, and a colour so you can spot it. The languages matter for recordings: they are what the app listens for when it transcribes them.
2. Create a card
Tap + > New Card. A card called Untitled Card opens straight away. Tap the name at the top to rename it. Naming it after the question, such as What is photosynthesis?, makes it easy to find later. Cards save as you go, so there is no save button.
A card is made of sides that play in order:
- Two sides, a Question and an Answer, suit almost everything.
- One side is a Comment: a phrase to repeat after, or a clip to listen to.
- Three or more, named Side 1, Side 2 and so on, leave room for a hint, an example sentence or a longer explanation.
3. Add the question
There are two ways to make a side, and you can mix them on the same card.
Record it in your own voice
Recording suits anything where how it sounds matters: pronunciation, an accent, the lines of a talk.
- Tap Record Audio at the bottom of the card.
- Tap the red button and say the question. Tap it again to stop.
- Play it back to check it. If it is right, tap the checkmark to add it to the card.
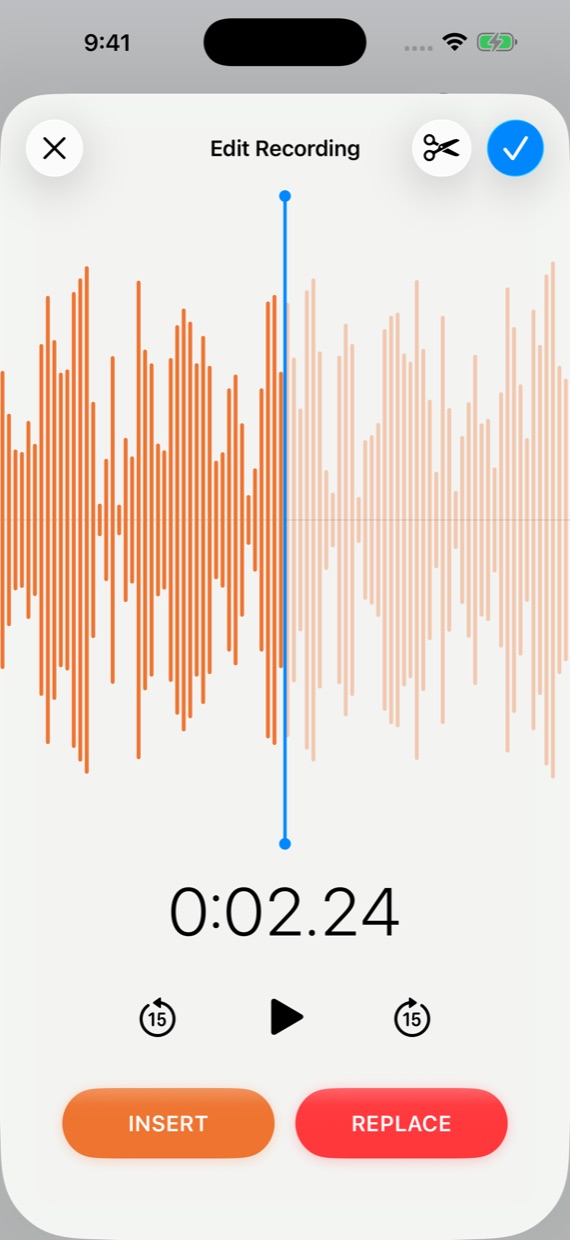
You rarely need to start again:
- Resume carries on recording from the end.
- Move the playhead into the clip and the record button splits into Insert, which adds audio at that point, and Replace, which records over what follows.
- Trim cuts silence or a false start from either end.
Once a recording is transcribed, its words appear on the card, light up as they are spoken in reviews, and show up in search.
Or type it for a voice to read
Typing is faster, sounds the same every time, and is how you make cards in a language you cannot pronounce yet.
- Tap Text to Speech.
- Type what the side should say.
- Check the Voice, then tap Generate Audio and listen.
- Changed the text or the voice? Tap Regenerate Audio.
- Tap the checkmark to add it to the card.
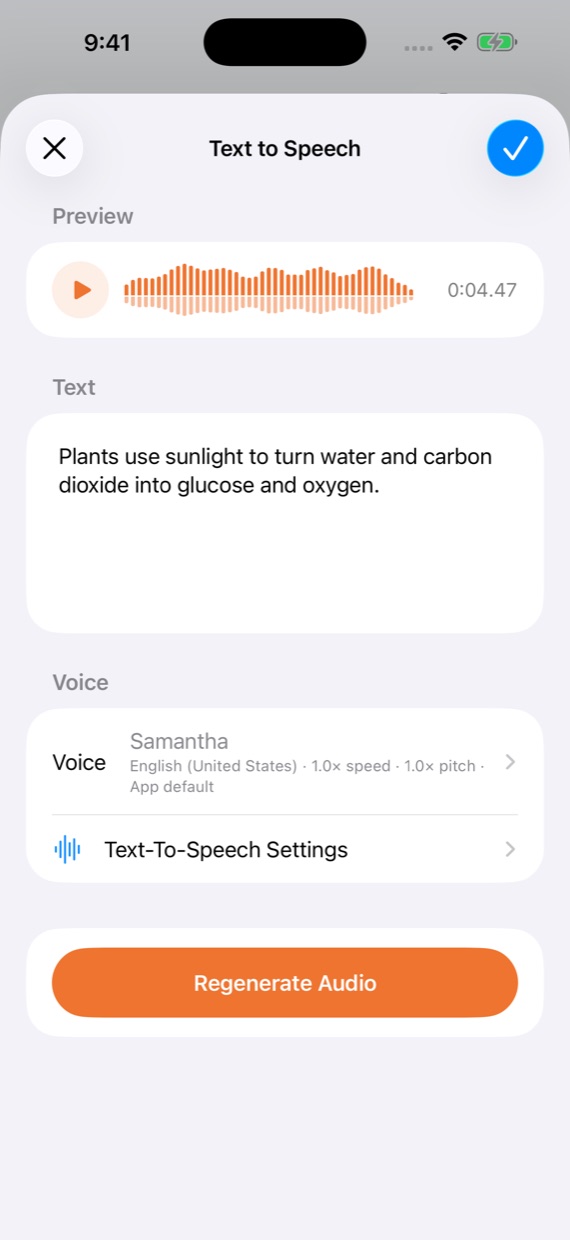
Three kinds of voice can read your cards:
- Your device's voices, which are ready straight away.
- Kokoro voices, which sound noticeably more natural and still run on your device, so they work offline. Add them under Settings > Text-To-Speech > My Voices.
- Amazon Polly and OpenAI, using your own account with those services.
Card Side Voices, on the same settings screen, gives each side its own default voice. Set the question to your language and the answer to the one you are learning, and every new card starts out right.
4. Add the answer
Add the second side the same way. Mixing works well: record the question in your own words and let a voice read the answer, or the other way round.
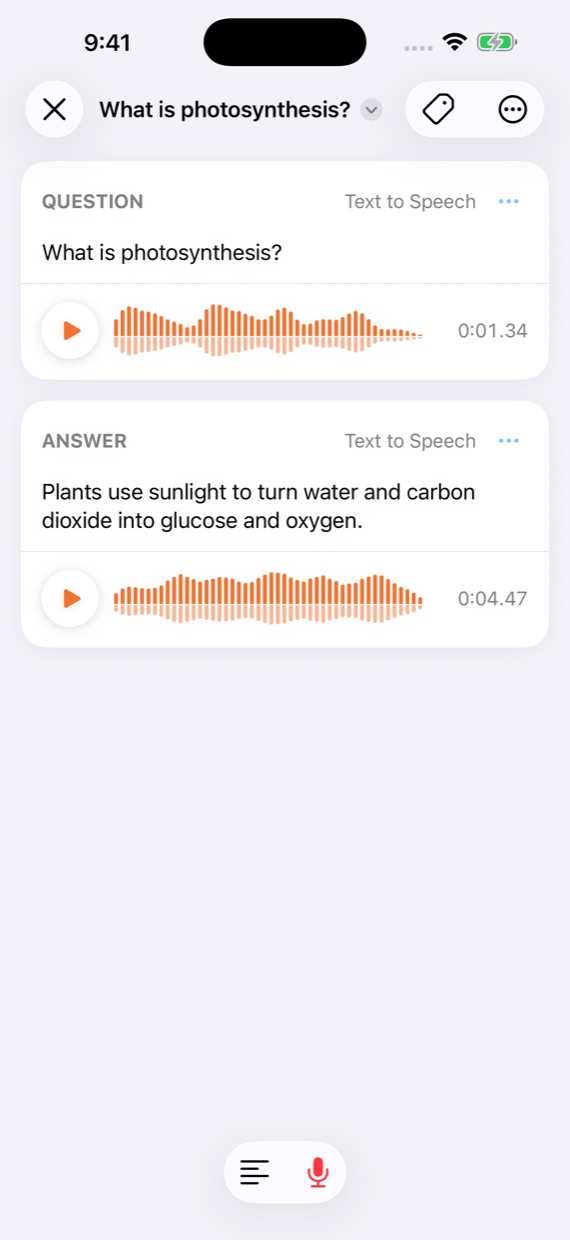
To change a side later, use the ⋯ button beside its name: Edit reopens it in the recorder or the text-to-speech screen. ⋯ > Reorder Sides changes the order they play in.
5. Review it
- Open the Review tab and tap Start now on Daily Review.
- The question plays. Answer it in your head, or out loud.
- Tap Reveal answer to hear the answer.
- Grade yourself: Again, Hard, Good or Easy. The time under each button is when the card comes back if you choose it.
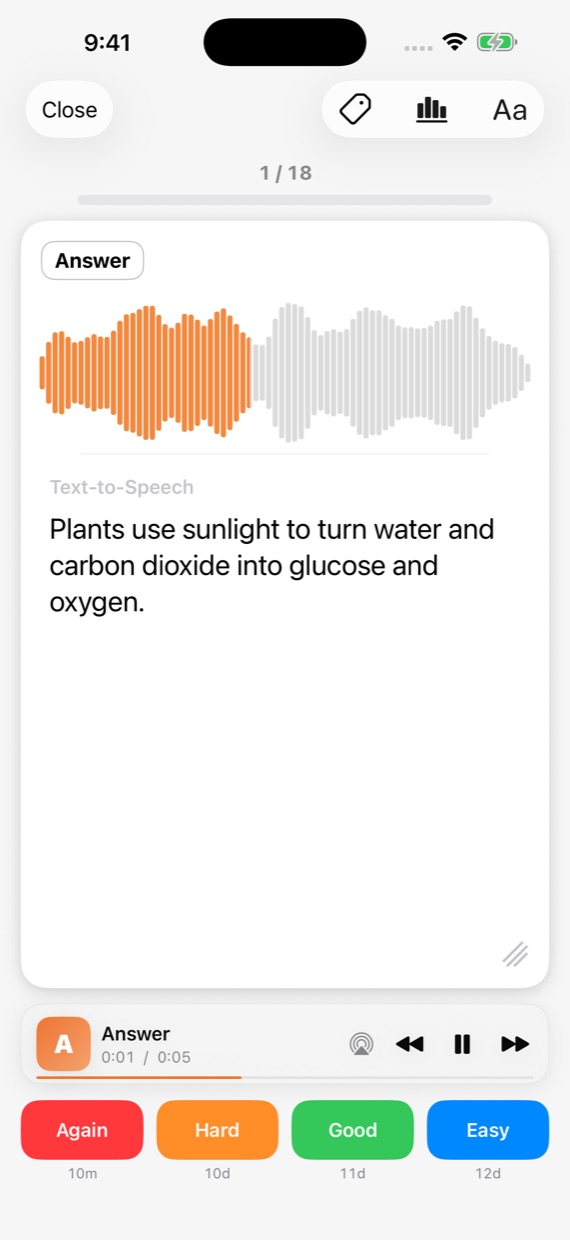
The scheduler, FSRS, uses your grades to bring each card back just before you would forget it. Cards you know drift further apart, and cards you miss come back soon.
To review without touching the phone, long press Daily Review, choose Edit Session, and turn on Autoplay Sides and Use Voice Commands. The answer then plays by itself after a pause, and you grade by saying again, hard, good or easy.
Make lots of cards at once
You do not have to build a deck one card at a time. + > Import… has three options:
- Import CSV turns a spreadsheet into cards. Each row becomes a card and each column a side, read by the voice you choose for that side. A two-column list of words and translations becomes a vocabulary deck in one step, and the preview shows every card before anything is created.
- Import Audio Files turns clips you recorded elsewhere into cards. It can pair them by name, so
capital-france-q.mp3andcapital-france-a.mp3become the question and answer of one card. - Import Shared File opens a
.sharedeck someone sent you.
Or start from a deck someone else made. Shared Cards has collections for languages, music, medicine and more, and you can listen to any card before you download it.
Tips for cards that work by ear
- One fact per card. If a card asks two things, you will grade it on whichever you remember.
- Keep each side short. Under ten seconds is a good aim. You cannot re-read a sentence you only heard.
- Make the question specific. "When did Einstein publish special relativity?" has one answer. "What did Einstein discover?" has many.
- Say it out loud before you keep it. If you stumble, the voice probably will too.
- Check how voices say names and jargon. If a word comes out wrong, respell it the way it should sound.
There is more on this in Writing Good Cards.
Next steps
- Creating Cards: everything the card editor can do.
- Importing Cards: CSV and audio imports in detail.
- Voices & Text-to-Speech: choosing and adding voices.
- Review Sessions and Voice Commands: setting up hands-free review.